Requires Excel 2013 or better. It was tested running
Windows-10. I don't know if it will work on a Mac.
The NIST_XCOM.xlam Add-In and NIST_XCOM.xlsm Workbook provide functions and macros
for getting the attenuation properties of atoms and compounds.
LazzyIzzi is not currently associated with NIST but was a guest researcher there many years ago. These Excel files are not a NIST product but most of the data within them were downloaded from the NIST XCOM database and are used with permission. It should be noted that NIST retains copyright on the XCOM data and reserves the right to charge for its use in the future. See the XCOM website for more information.
XLAM or XLSM, which one is better for you? Do not install XLAM if you are using XLSM.
Use the Add-In xlam file to make the functions and macros part of your Excel application.
Pro: The X-ray functionality will be available in all workbooks created after the Add-In is installed
Con: Dependent workbooks will not work if the Add-In is not present or has been uninstalled.
Use the Workbook xlsm file to use the functions and macros without altering your Excel environment.
Pro: The X-ray functionality will always be present in individual workbooks created by copying the xlsm.
Con: Each copy will duplicate all of the NIST data and will require more storage.
Add-In Functionality
Macros:
GetSpectrum - Lists and optionally plots the tabulated NIST mass absorption coefficients vs X-ray energy.
BeamHardening - Uses a 1D model to estimate/optimize a CT scanner setup that will produce an acceptable level of beam hardening.
Show Data Sheets - Unhides the NIST data, one sheet per element, about 100 sheets total.
Hide Data Sheets -Unshows the NIST data.
Help- Brings up this page. Requires an internet connection.
Special Note: Downloading Excel add-ins and macro enabled
workbooks can be dangerous due to the possibility of embedded malware.
Newer versions of Excel provide significant protection. Please take
appropriate precautions before enabling any downloaded Excel workbook.
Adding NIST_XCOM.xlam macros to the Excel "Home" toolbar
Do NOT do the steps below if you are using NIST_XCOM.XLSM
Download NIST_XCOM.xlam Install the NIST_XCOM in the default Add-ins Folder, in Windows it's usually C:\Users\YourUserName\AppData\Roaming\Microsoft\AddIns.
Run the macros from the Developer tab "Macros" ribbon item.
To make the Macros visible in the Home tab Ribbon...
The usual intuitive Microsoft 25 step process
To add "Developer" to the main toolbar
Click "File" in the main menu
Click "Options" at the bottom left
Click "Customize Ribbon"
Check the "Developer" box
Click OK
To add NIST_XCOM to the project references
Click the new "Developer" tab in the main menu
Click "Excel To add-ins"
Check the NIST_XCOM Reference
Click OK
To add "BeamHardening" and "GetSpectrum" Macros to main "Home" ribbon
Click "File" in the main menu
Click "Options" at the bottom left
Click "Customize Ribbon"
In the "Customize the Ribbon" menu select "Main Tabs"
Click the twisty next to "Home"
Click the "New Group" button
Click the "Rename" button
Enter "X-ray" in the "Display Name" box
Click OK
Click(select) "X-ray (Custom)" in the "Home" list
In the "Choose commands from" menu, select "Macros"
Select "BeamHardeningMacro"
Click "To add"
Select "GetSpectrumMacro"
Click "To add"
Click OK
Uninstall NIST_XCOM in the project references
Click the "Developer" tab in the main menu
Click "Excel To add-ins"
Uncheck the NIST_XCOM Reference
Click OK
When you open a workbook
Click on the Home tab
Click on either BeamHardeningMacro or GetSpectrumMacro in the Ribbon to load the macros.
Click OK on the security warnings.
Workbook(xlsm) Installation:
The Workbook does not require installation.
Download it and open it in Excel
Click the Enable Content button. A menu dialog box should appear.
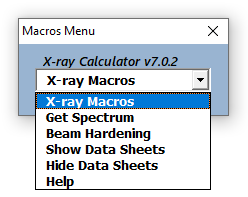
X-ray Macros Menu.
The xlsm file has slightly over 100 data sheets. The default behavior is to keep them hidden (most are also locked). The Show/Hide menu items allows you to view the sheets if necessary. If the Workbook should encounter an error, the menu will be unloaded. Use Ctrl+Shift+M to reload the menu.
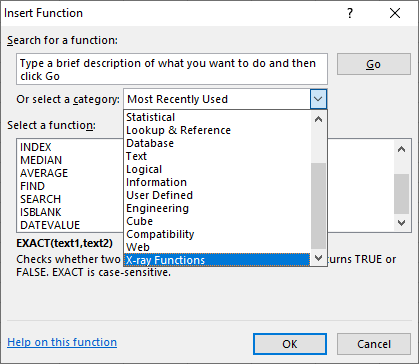
Using the Functions
To use the functions, Select an output cell(s), Click the
FORMULAS tab and then click the Insert Function icon. Fill in the required data and click OK.
Select X-ray Functions.
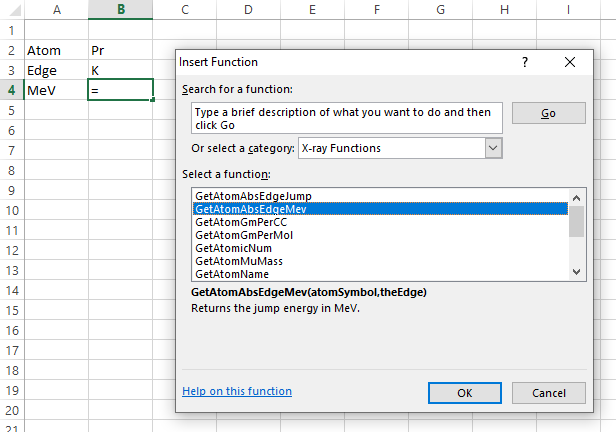
Select the function you want to use.
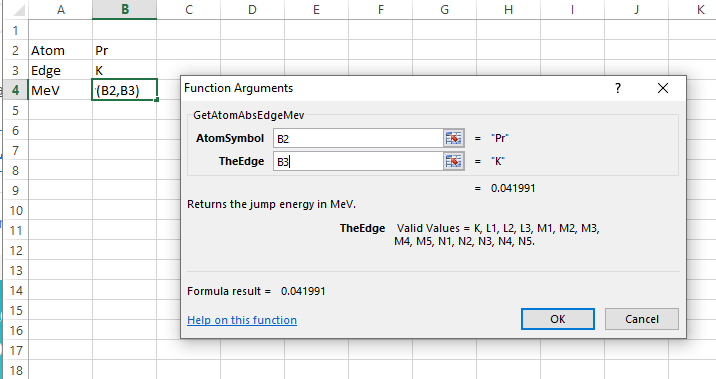
Select the input cells. Click OK.
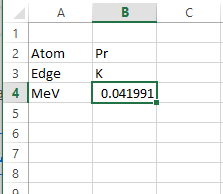
View the results.
Excel Array Functions (older versions of Excel)
GetFormualMevFromMuLin and GetFormualMevFromMuLinRatio functions
return arrays. This is noted in their input dialogs. Select at least two
contiguous row cells for output before calling the function. Do Not
click OK in the function dialog. Use Ctrl-Shift-Enter to execute the
function. The first value returned is the number of solutions. The contiguous row cells should be the number of solutions + 1.
Using the Macros
Click the ADD-INS tab(xlam) or use the Menu(xlsm) and click GetSpectrum or
BeamHardening.
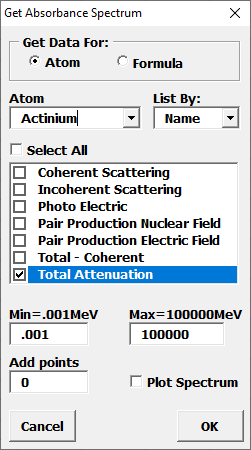
Get Spectrum
Use the radio buttons to select Atom or Formula
Get Spectrum returns a list of absorption cross-section data for
atoms or formulas over a selected energy range.
Get Spectrum for an atom.
The atoms can be listed by Symbol, Number, or Name. I prefer
Name.
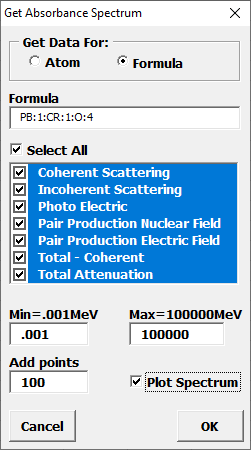
Get Spectrum for a Formula.
Formulas are entered manually using an Atom1:Count1:Atom2:Count2
formatted Formula
Check the desired cross-sections
Enter the desired energy range Min and Max
Select the number of interpolated points to add to the output.
This will create a separate list of N approximately log-spaced points
in the selected range.
Check Plot Spectrum if desired
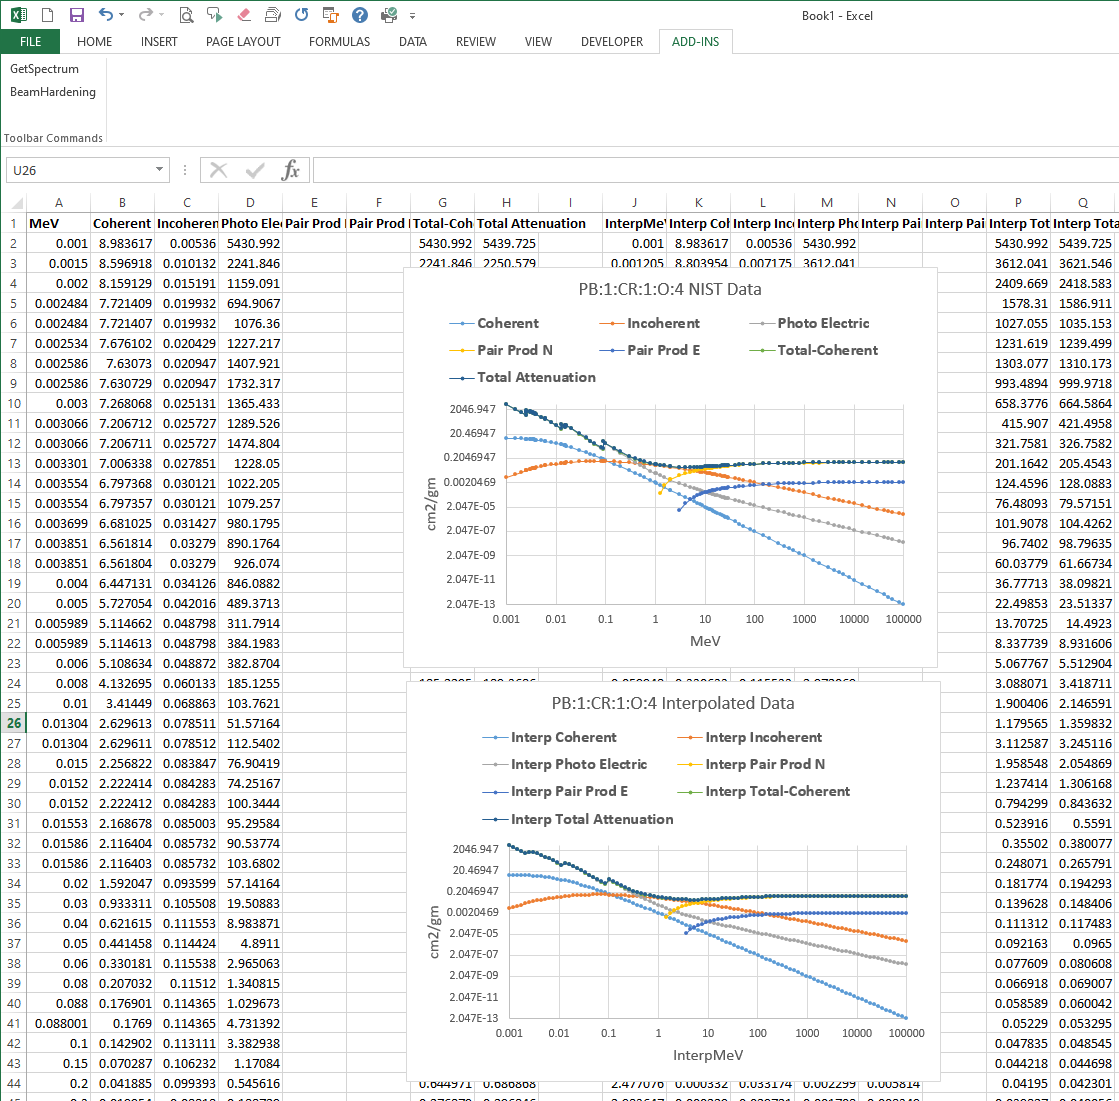
Data and spectrum for the Formula example.
Beam Hardening
Please refer to the ImageJ Scanner_Setup page for a
description of how this Macro works.
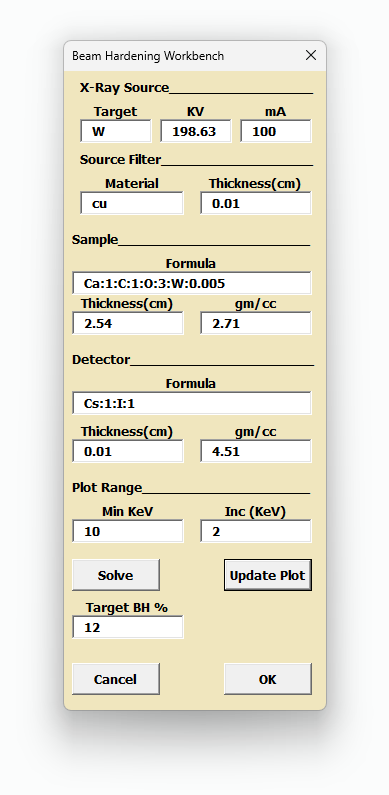
Beam Hardening Dialog.
Select BeamHardening from the Command Menu.
Edit the Source, Sample, Detector, and Plot Range fields.
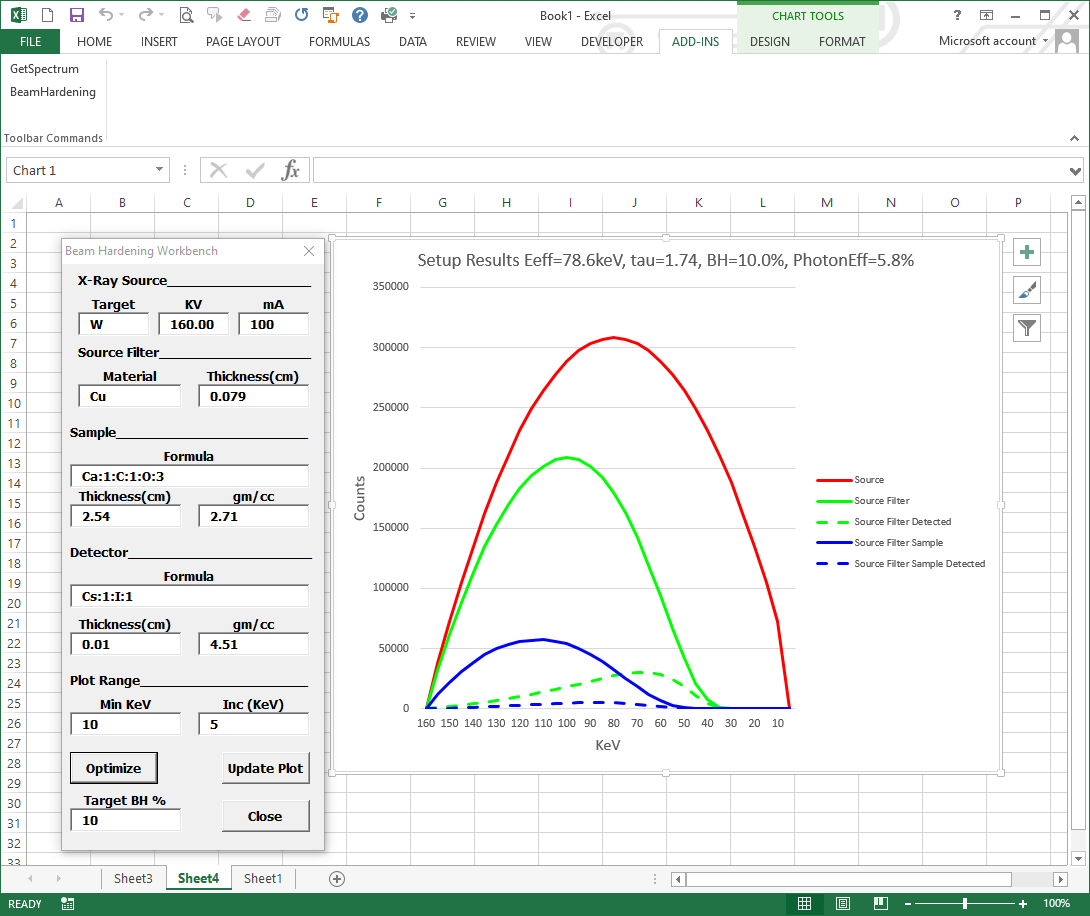
Click Update Plot. The effective energy, sample tau,
BeamHardening %, and photon efficiency % appear in the plot title.
Twiddle the parameters to optimize the beam hardening and
photon efficiency.
OR enter the level of tolerable beam hardening in the Target
BH% field and click Optimize to let the Solver maximize Photon Use%
while constraining sample tau and beam hardening. Note: Increase the
default 1 KeV plot increment to 5 KeV to speed up the solver.
The Spectral distributions for the Settings.
The Optimized Spectral distributions a 12% Target
BH.